
Share folders or individual surveys with users, teams, courses, or your organization and control what each collaborator can do.
In this article:- Share from the Surveys home page
- Share from the survey builder
- Choose a collaboration role
- Share with an individual user
- Share with a team
- Share with a course
- Share with the organization
- Find content shared with you
You can share either a folder and everything inside it or one individual survey.
Share a folder
Find the folder on My Surveys, select the three-dot menu at the end of its row, and select Share. The permissions apply to the folder and its contents.
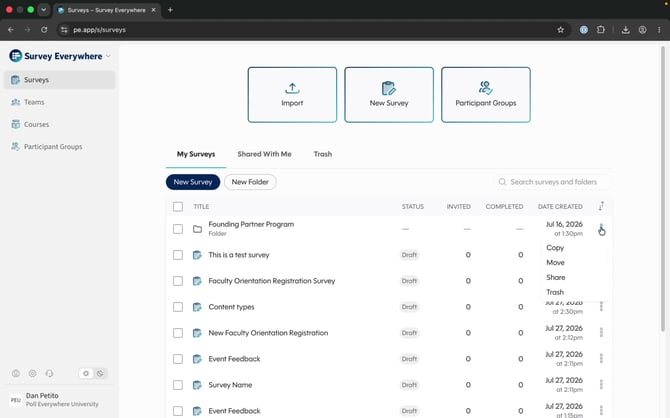 Select Share from a folder’s menu to share the folder and its contents.
Share an individual survey
Find the survey on My Surveys, select the three-dot menu at the end of its row, and select Share.
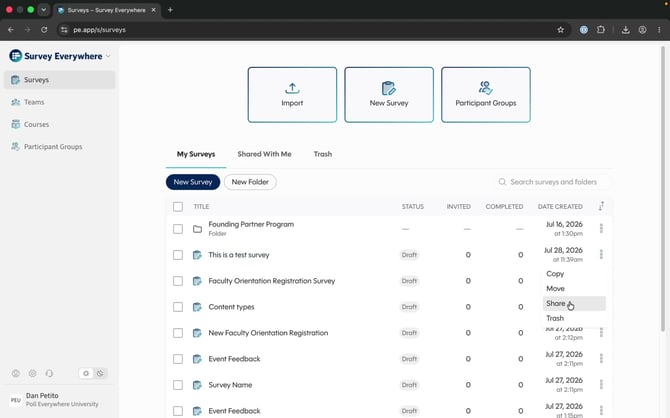 Select Share from a survey’s menu to share only that survey.
Open the survey and select the people icon in the top navigation. The Collaborate tooltip identifies the control.
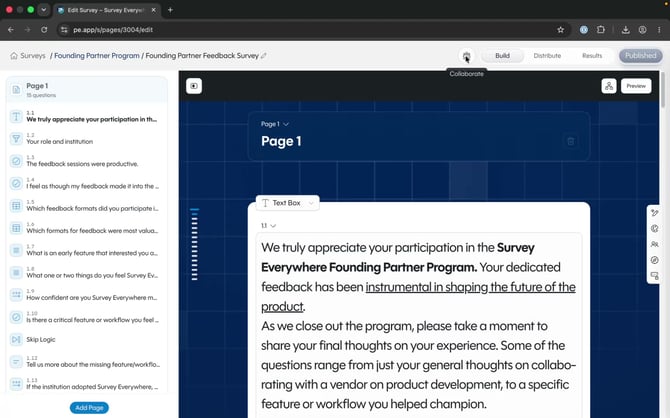
Select the people icon to open collaboration settings from inside a survey.
The Collaborate window contains separate rows for User, Team, Course, and Organization. These are alternative sharing scopes; use the row that matches the audience you want to grant access.
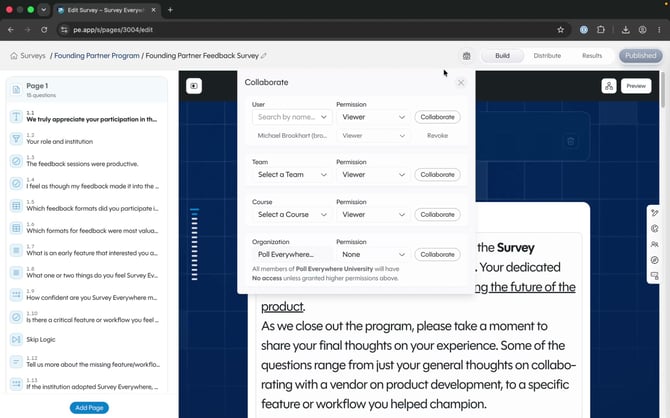 Choose a sharing scope, assign a role, and select Collaborate.
Assign the least-permissive role that allows the collaborator to complete their work:
- Viewer: Can view the survey but cannot edit, delete, or distribute it.
- Distributor: Can distribute the survey but cannot edit or delete it.
- Editor: Can edit the survey but cannot delete it.
- Owner: Can edit and delete the survey.
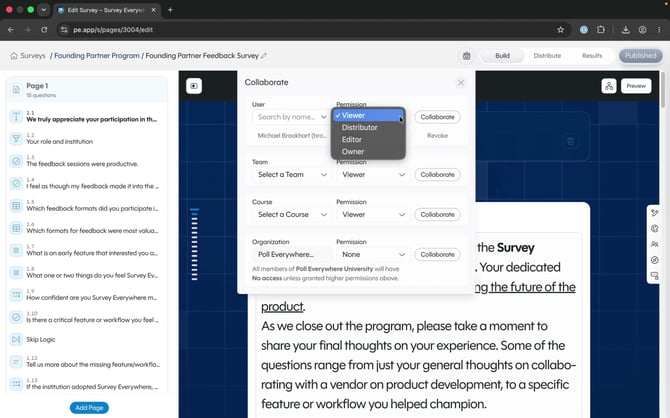
Select the role that provides the collaborator only the access they need.
Important: Owner includes permission to delete the survey. Assign this role only when deletion access is required.
Share with an individual userIn the User row, search for the person by name or email address. Select the user, choose a role, and then select Collaborate.
Existing user collaborators appear below the search row with their current role. Select Revoke when that person should no longer have access.
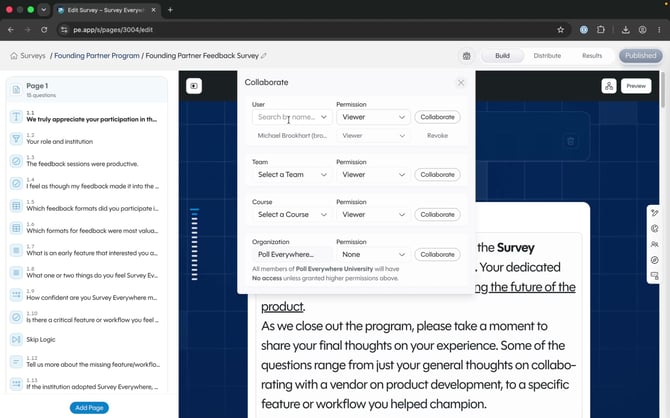 Search for an individual, assign a role, and select Collaborate.
In the Team row, choose an existing team or user group, select its role, and then select Collaborate. Team sharing gives the selected group access to the same survey or folder.
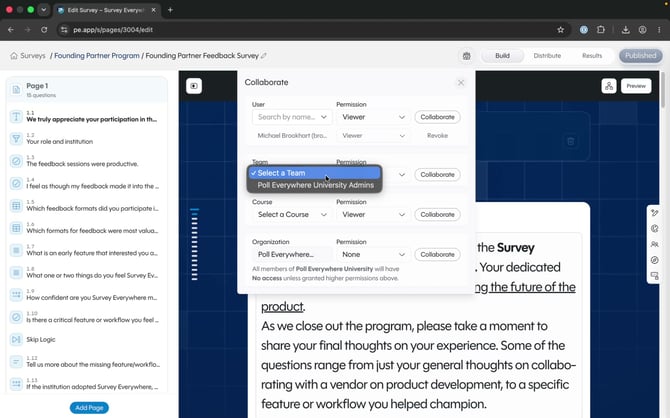 Select an existing team, choose its role, and collaborate.
The Course menu lists courses synchronized from a learning management system. Choose a course, assign its role, and then select Collaborate.
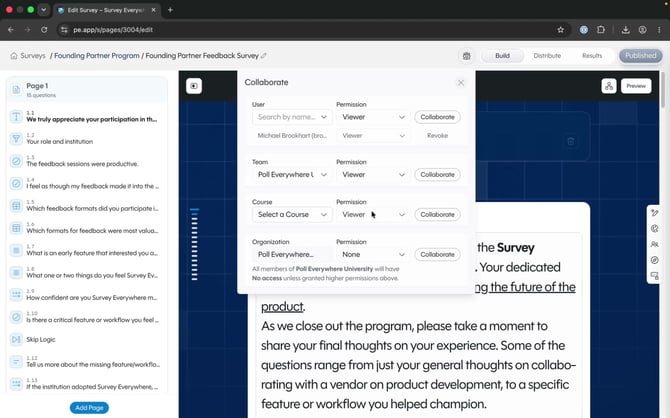 Select a synchronized LMS course and assign the appropriate role.
Use Organization to grant account-wide access to everyone currently on the organization’s license. Select an organization role and then select Collaborate.
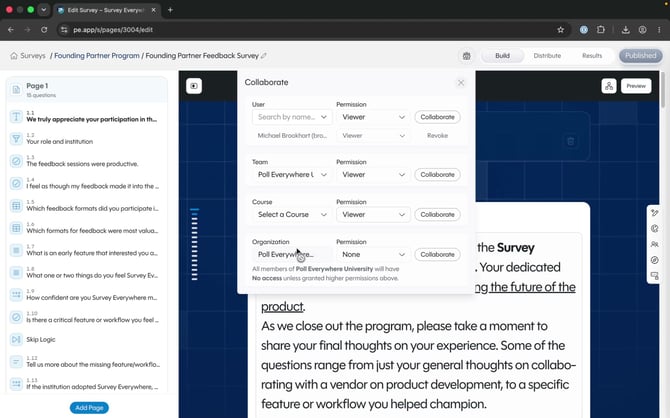 Organization permissions apply to every member unless a higher permission is granted elsewhere.
Before sharing: Organization sharing affects everyone on the license. Confirm the role carefully before applying it.
Find content shared with youContent another user shares with you appears under Shared With Me on the Surveys home page. Your available actions depend on the role assigned by the owner.
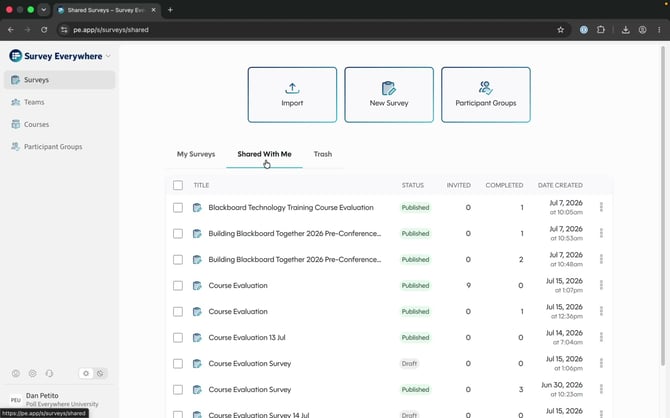 Open Shared With Me to find surveys and folders shared by other users.